Being a teacher means that during the summer months, if you aren’t working a part-time job (and let’s be honest, why would you?), the days can feel a little long and lonely, especially if you’re young and have no children to take care of, like me. To combat this summer loneliness with a little social interaction, my wonderful and dear friend Melanie and I planned to spend a day together working on DIY projects – she dubbed it “crafternoon.” We both poured over projects on Pinterest, and then we made a trip to Hobby Lobby and spent the day crafting.
Being creative and spending time with friends? It’s good for the soul.
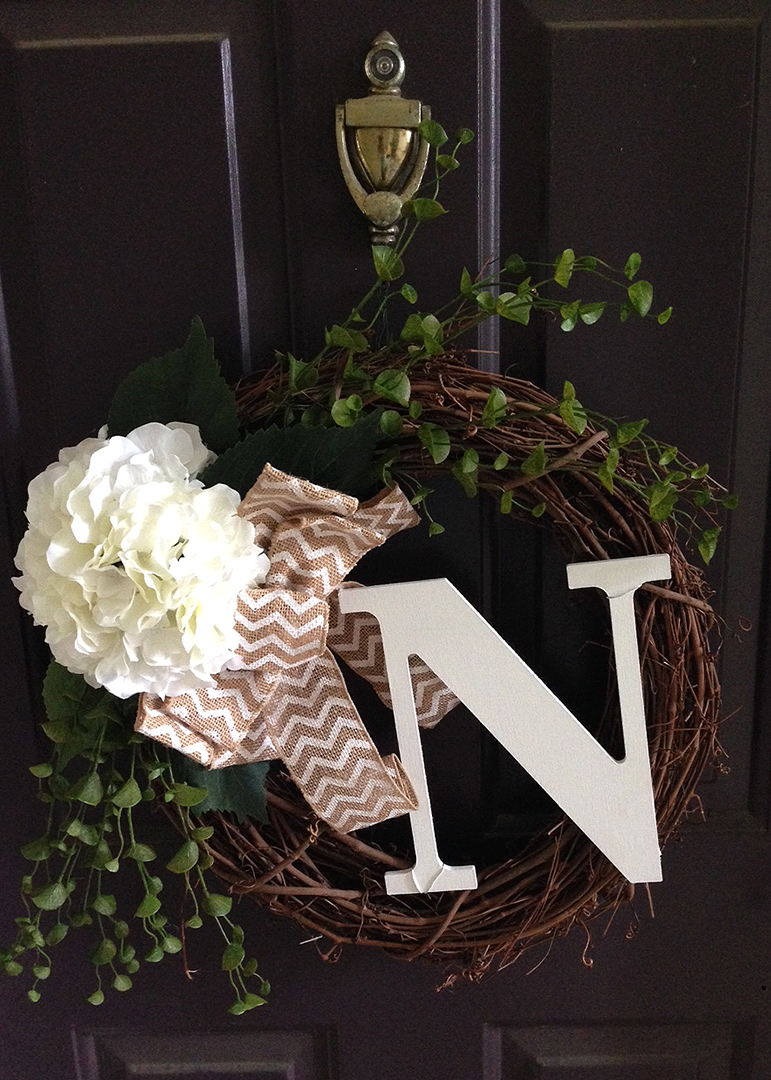
Melanie used glittery cardstock and a blank canvas to make an art piece for her niece’s sixth birthday. I wanted to make a wreath for our front door. Since we live in an apartment, personalizing our space is always a challenge, and Jeremy and I are forever dreaming of the DIY projects we’ll do in our home someday. (First step? Modernizing a bathroom to create a spa-like retreat. Again, someday.) For now, we’re stuck with small projects, and making a wreath seemed like a simple way to brighten up our home for the summer season. I wanted to include a monogram letter and make a wreath that was springy, summery, and generally warm and inviting. There are literally a gazillion beautifully crafted wreaths on Etsy (in my opinion, these were the best and gave me great inspiration), and after looking at several examples, I gave it a try. And I have to say – I’m really happy with the results!
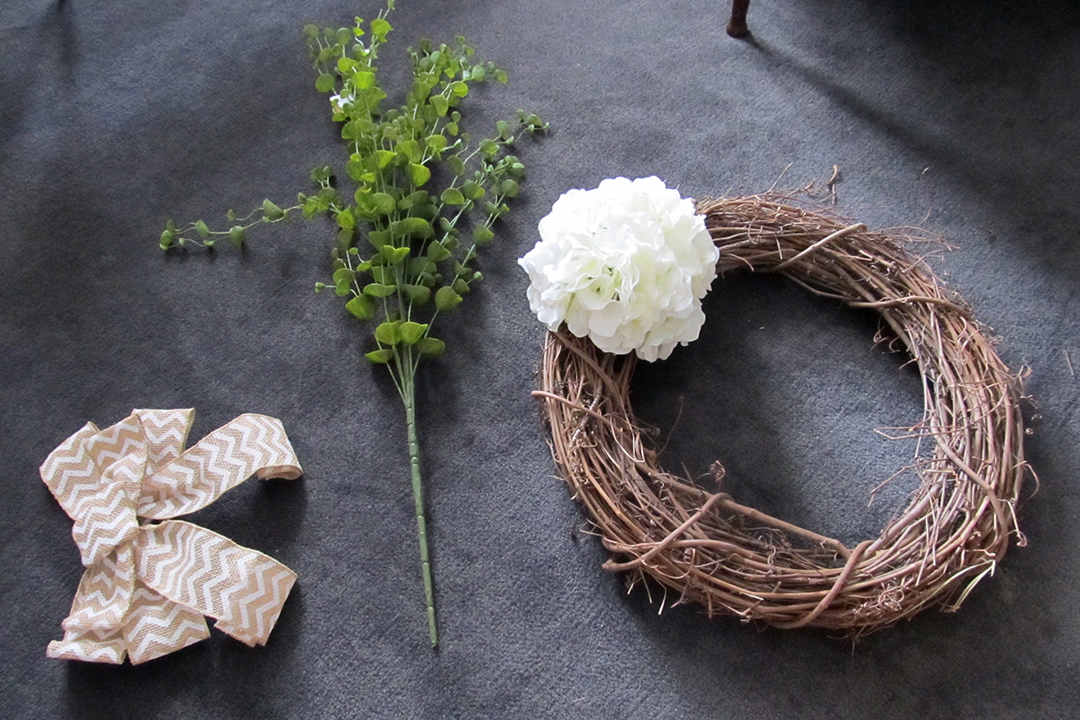
If you’re the crafty type, you can probably look at this picture and put this wreath together yourself. That’s what I did. But I’ll offer a few tips and instructions along the way.
First, I went to both Hobby Lobby and Michael’s to purchase the supplies for the project. I think everything together cost about $25 (contingent on craft store sales, of course), which isn’t bad, especially considering this wreath was on sale on Etsy for around $65. At Michael’s, I bought a single white hydrangea and a stalk of plasticy “greenery” of some sort, and that was enough. I knew I liked the burlap bows I’d seen on Etsy, and I found a very cool chevron one, which saved me the blood, sweat, and tears I’d inevitably suffer if I tried to craft that bow myself. (My mom is the queen of bows. You should see her Christmas packages – she’s like Martha Stewart, only better and she’s never been to prison. Me, on the other hand? No idea how to tie ribbon like that. Maybe my mom can guest-star on this blog during the holidays and teach us how to tie bows like a champ.) I bought a simple wreath and some green floral/craft wire at Michael’s too.
I browsed the monogram letters at Michael’s, but I didn’t see anything that was quite the style I wanted. I made a stop at Hobby Lobby and was much happier with the giant “N” I found there. Very classic. I also bought some white indoor/outdoor craft paint, so my monogram could handle the elements if our next front door is a little more exposed.
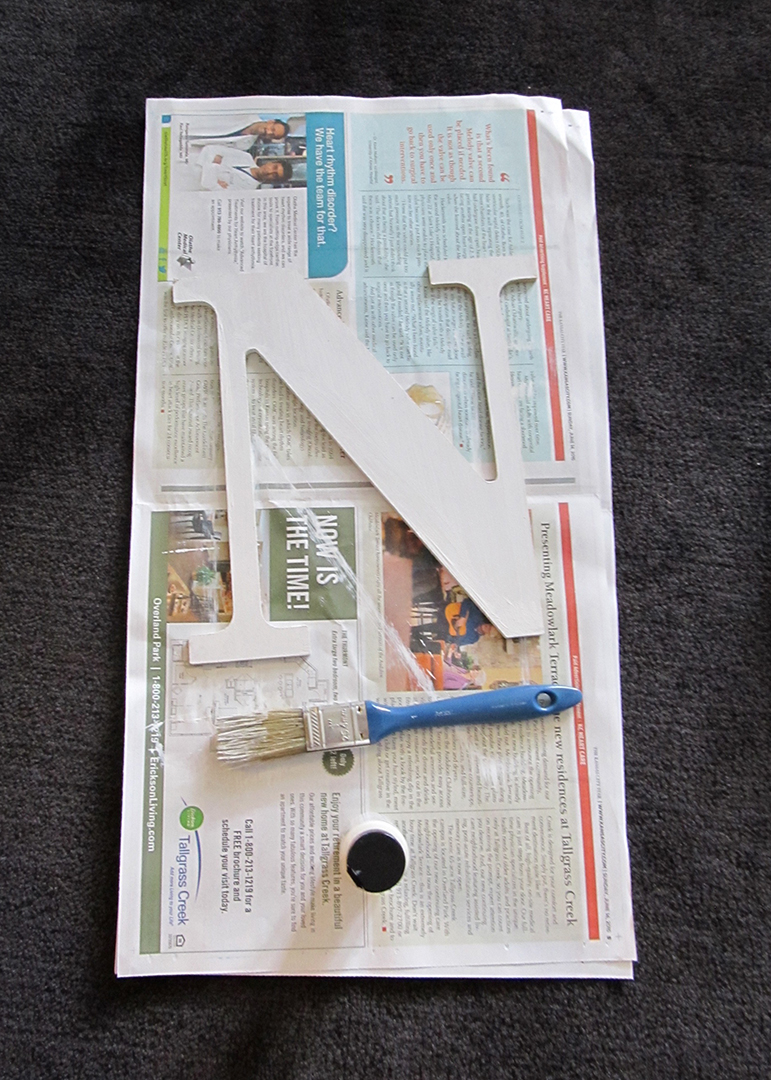
The first thing I did was paint the “N” white. I did one quick coat on the back, and two coats on the front and edges. While the “N” dried, I assembled my wreath.
The hydrangea came with a very long stem. With a pair of wire cutters, I chopped the stem to about two inches. This made it really easy to attach to the wreath. Once I decided where I wanted to place the flower, I pushed the stub of the stem into the wreath, and then used a hot glue gun to glue it in place. I made sure to hold the flower where I wanted it while the glue dried, but it was pretty secure even without the glue. Jamming that stub of a stem into the wreath really helped secure it.

Then I looked at the remaining stem of the hydrangea and realized the big silk leaves on it would add a nice base under the head of the flower. I snipped the leaves off the stem, arranged them under the hydrangea head, and secured them with more hot glue. Then I did the same with the greenery sprigs. I was a bit nervous about placing them (one side of my wreath has the sprigs under the leaves and the other has the opposite, but I thought it looked good that way), but Melanie assured me it didn’t look stupid. So I glued five sprigs on each side of the flower, and I think she was right!
As you’re gluing, be sure you pay attention to where the hot glue is dripping or sliding, and be sure that it completely secures your stems and wires in place. Gluing those greenery sprigs took some careful attention.
Finally, I secured the bow by tying its gold wire through the wreath and then putting hot glue over the tied wire for good measure. I also glued the back part of the wreath to the silk flower leaves so the layers stayed flat.
The biggest challenge was securing the monogram letter. Some DIY tutorials tell you to glue it to the wreath with hot glue – maybe this will work, but I was worried about the letter falling off in rain, wind, or humidity. First I tried to use my parents’ staple gun, thinking I could staple a piece of wire to the back of the letter then use the wire to tie the letter in place. This was a good idea – until the staple went almost all the way through the N. Whoops.
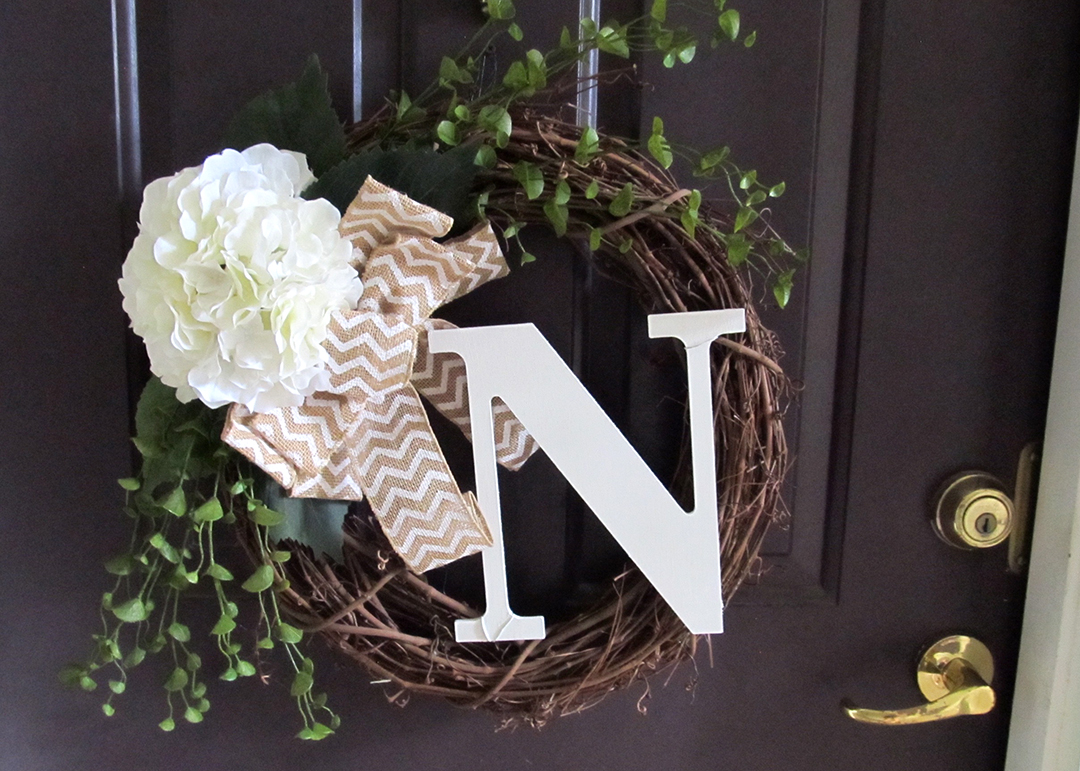
Luckily, it was nothing a little sanding and repainting couldn’t fix. I ended up trying to hot glue the letter, failing, and deciding to attach it with wrapped wire. I twisted a small amount of wire at the base and the top of the “N” to secure it, and then I used a little white paint to help hide the wire. You could probably buy white wire for this purpose, but this looked good enough for me. It’s pretty subtle on the final product, and I felt like it was much more secure than just glue. If you don’t like the wire look, try some wood glue, or give the hot glue a shot. I’m no expert, but it will probably work.
In the end, I was really happy with the final product. I hung it on our door (weirdly low, because that’s where the apartment complex decided to put the nail), and Jeremy came home from work and told me it was beautiful and very welcoming. And I agree! “Crafternoon” was a success. On to more projects… and more relaxed summer days.

Beautiful! Love the wreath!
So so pretty! Love it